Deploying the Contract to the Ethereum Network
Our contract code has been built and tested. Now it is time to deploy it to a live Ethereum network. There are some configurations steps we must do on our project to set it up for a deployment to the blockchain protocol.
Generating an Ethereum Mnemonic list
We can deploy our contract to a local, or external network. The external network can be a test network like Ropsten or Rinkeby, or it can be the main Ethereum network.
In this example, we will deploy our contract to the Ropsten Ethereum network.
First, we need to create a set of mnemonics, or a 12 word-set that maps to an Ethereum private key, and we can use for our deployment.
To do so, head to https://iancoleman.io/bip39/ web app.
Select 12 words, and click on generate.

This will generate a list of 12 words, that map to a private key.
Let’s keep this mnemonic at hand.

Further down the page, we select the coin ETH - Ethereum.

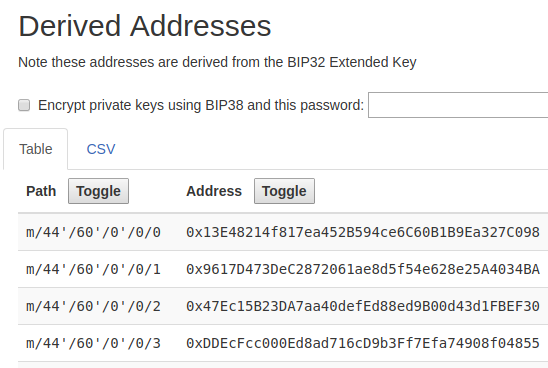
After choosing the coin, the application will derive a set of public keys, and addresses that are valid in the Ethereum protocol.

We can select the first address and fund it through a free Ropsten faucet.
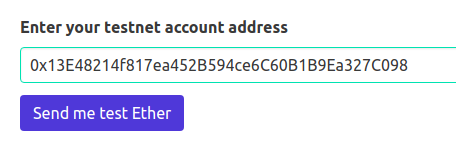
We copy that address, and head to the URL: https://faucet.ropsten.be/.
Paste it in the input field and click on Send me test Ether.

We will receive a confirmation, that some test Ether has been sent to the address:
0x13E48214f817ea452B594ce6C60B1B9Ea327C098
Which is controlled by a private key, that maps to our 12-word-mnemonic.
region cross fan also tenant boy marble milk evoke hedgehog adult prosper
Truffle.js configuration
Before setting up our configuration file, we need to install an npm package.
Let's run the next command in our CDE terminal.
$ npm install -s truffle-hdwallet-providerWe can now begin the configuration of the truffle.js file, located in our lotteryapp directory.
Starting by making use of the package we just installed:

Then create a constant named mnemonic with our list of 12-words:

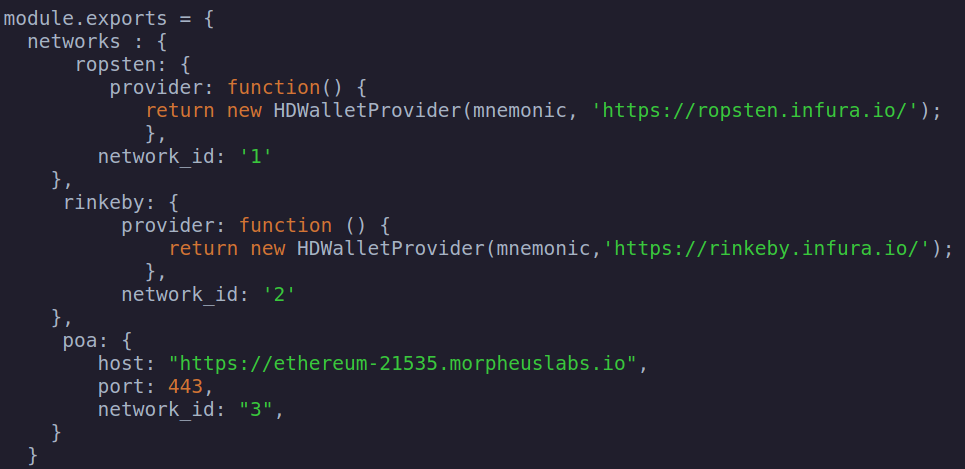
Now we configure the Ropsten network as such:

Creating the migration file
We will now create a file in the migrations directory named 2_deploy_contracts.js.

Inside it, we will reference our Lottery contract.

Finally, we must run the next command to start the migrations and deploy our smart contract to the Ropsten Ethereum Network.
$ truffle migrate --network ropstenWe should see and output similar to this, which will indicate that our contract was successfully deployed.

This is the address of our contract:
We can check that it has been deployed by searching for this same address in a Ropsten explorer:
https://ropsten.etherscan.io/address/0x3fa11fb8b1080a68ebb9a439ddfda38d2950433d
We could add more networks to our truffle.js file, allowing us to deploy our contract to other local or public network as such:

And deploy the contract to a specific network by following the next structure:
$ truffle migrate --network <Name_of_Network>Updated 10 months ago
